


Hip & Ridge Application
- Separate each piece of ProEdge® hip & ridge shingles into three individual shingles at the perforations.
- Create a starter shingle by removing the 6 inch exposure portion of the shingle.
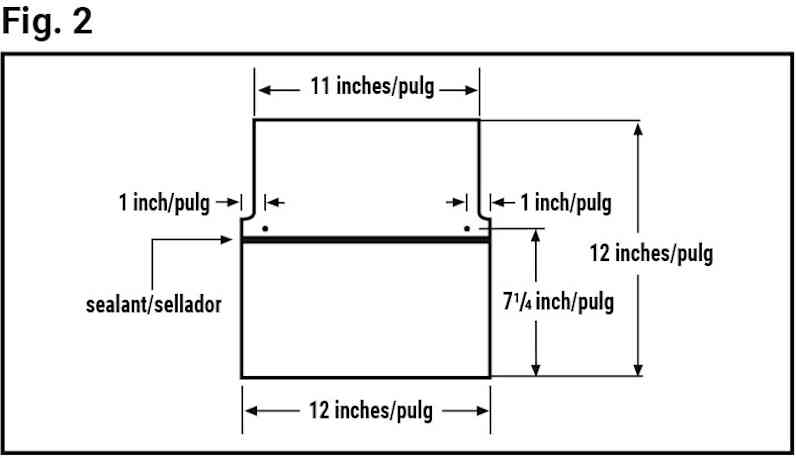
- Beginning at the bottom of each hip or the end of the ridge opposite the prevailing wind direction, install the starter shingle using 1 fastener on each side, 1 inch from the side edge and 1 ¼ inch from the cut end.
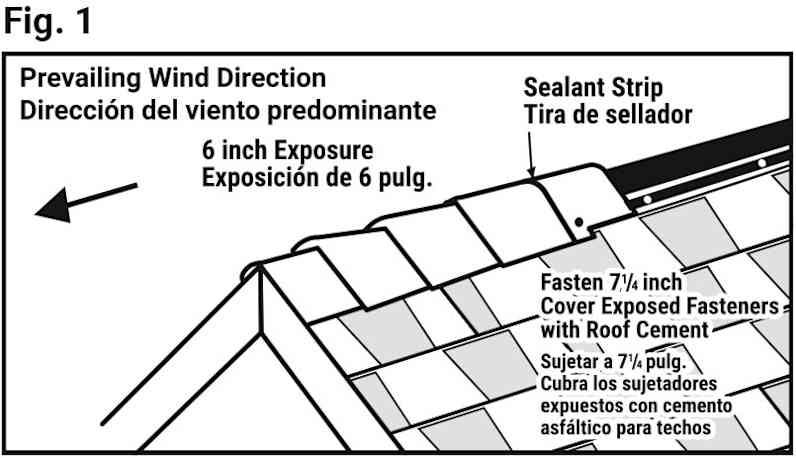
- Continue installing shingles up the hip or ridge by fastening each shingle with 1 fastener on each side, 1 inch from the side edge and 7 ¼ inches from the exposed end. See Figs. 1 & 2.
- Apply remaining hip and ridge shingles in the same manner with a 6 inch exposure.
- When finishing the ridge, leave no headlap portion of the last hip and ridge shingle exposed. One option is to use the 6 inch exposed portion of a hip and ridge shingle, cutting a piece the appropriate length to extend over the headlap portion of the shingle to the end of the ridge.
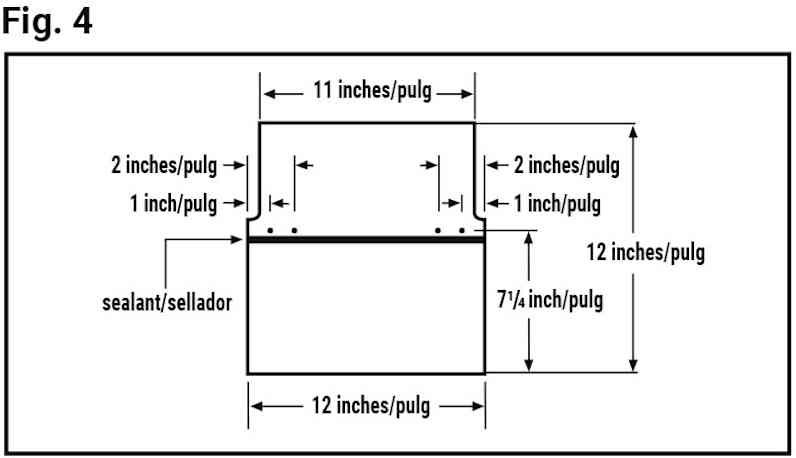
- Fasten final piece with two nails, each 1 inch in from the side edge and 1 inch in from the end of the ridge. Cover exposed fasteners with asphalt roof cement. Asphalt roof cement must meet ASTM D-4586 Type I or Type II (Asbestos Free).