Step 4: Installing the Ridge Vent
Note: For the best appearance, run the ridge vent from rake edge to rake edge.
- Snap a chalk line 7 inches down from the ridge peak on both sides of the ridge from rake edge to rake edge. These will be the alignment lines.
- Center the ridge vent evenly between the chalk lines and secure the starting end with one nail on each side of the vent.
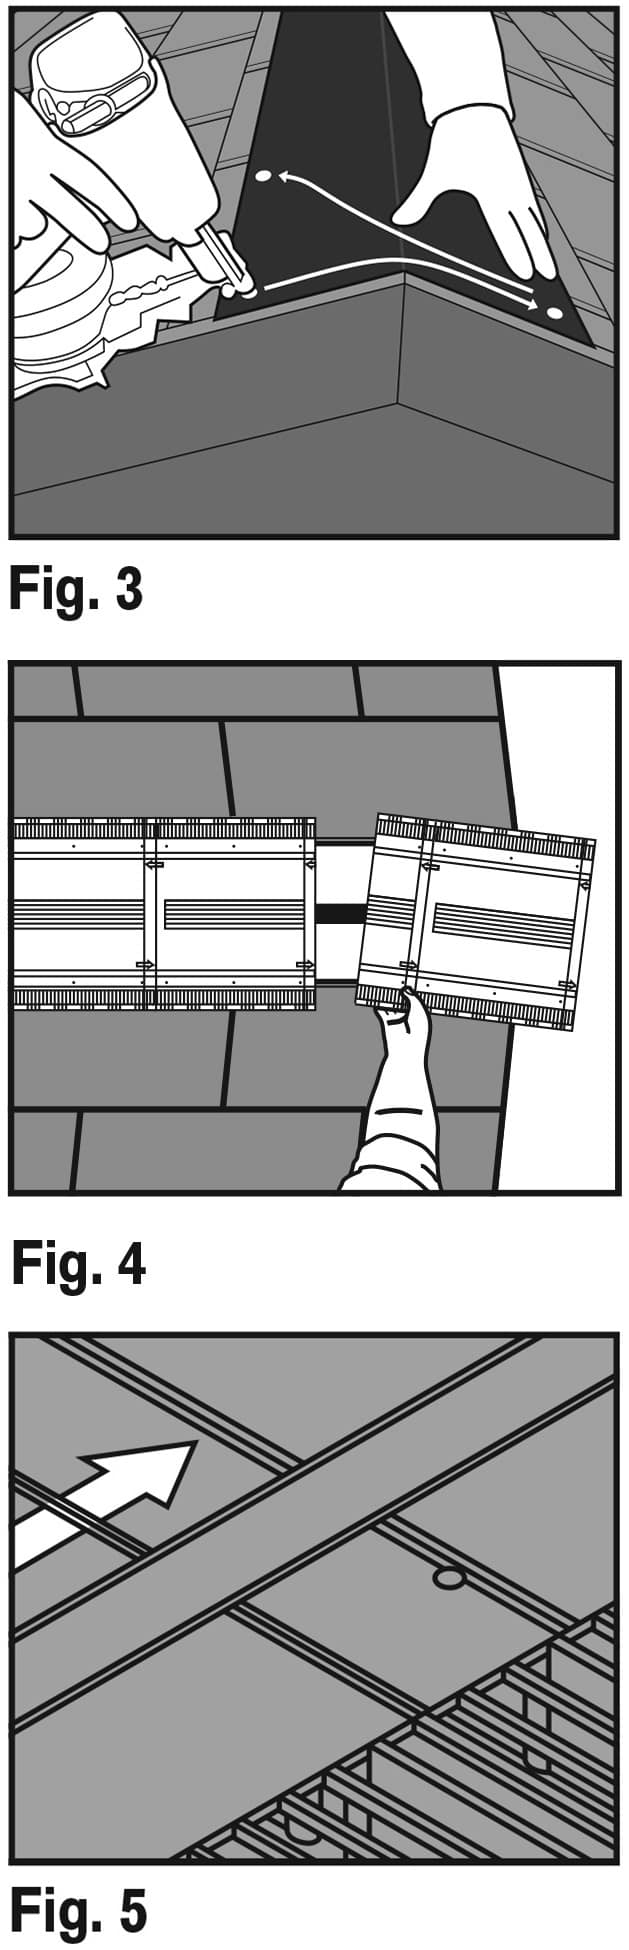
- Roll out the vent along the ridge, using the chalk lines for alignment. Remove any slack from the vent and nail the vent every 6 inches nailing from one side of the vent then the other. See Fig. 3.
Note: End plugs are built into the vent every 12 inches. The vent should always begin and end with an end plug. See Fig. 4.
Cutting Details: The top of the vent provides directional arrows and cut lines to help with beginning and ending installation. When beginning or ending an install, cut the vent on the cut line indicated by the arrow in the direction the vent is being installed. This will ensure the vent will have an end plug at both ends of the rake edge. See Fig. 5.