This is a cache of https://www.owenscorning.com/en-us/roofing/install-instructions/ridgeprowler. It is a snapshot of the page as it appeared on 2026-02-18T03:24:34.837+0000.
<strong>ventsure</strong>® RidgeProwler™ 30 Installation Instructions | Owens Corning Roofing
Skip to main content

ventsure® RidgeProwler™ 30

Installation Instructions

ventsure® RidgeProwler™ 30 Ridge Vents can be installed on roof pitches ranging from 2:12 to 16:12.

Important Notes

  1. Determine your ventilation requirements prior to installation. Many codes require 1 square foot of ventilation area for every 150 square feet of attic space. For a balanced system, no more than 50% of the required ventilation should be exhaust ventilation.
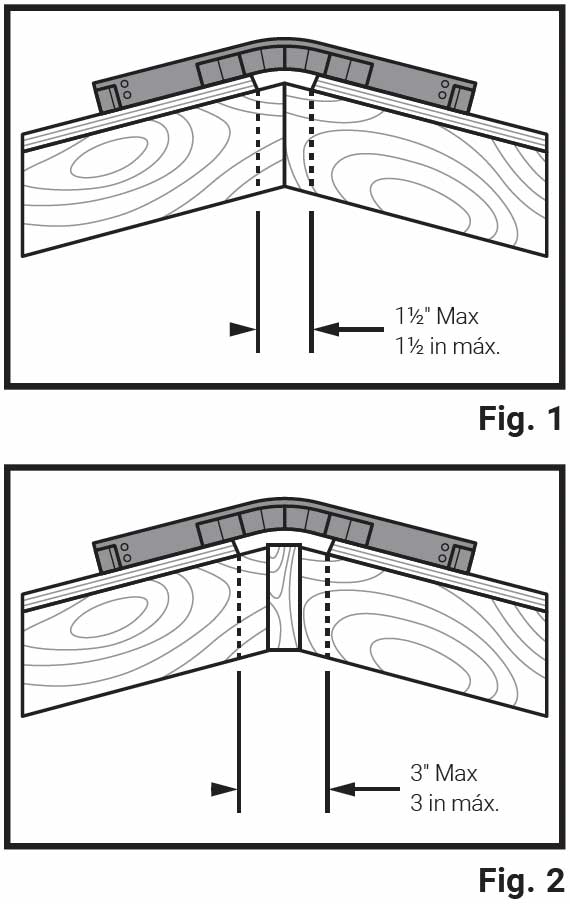
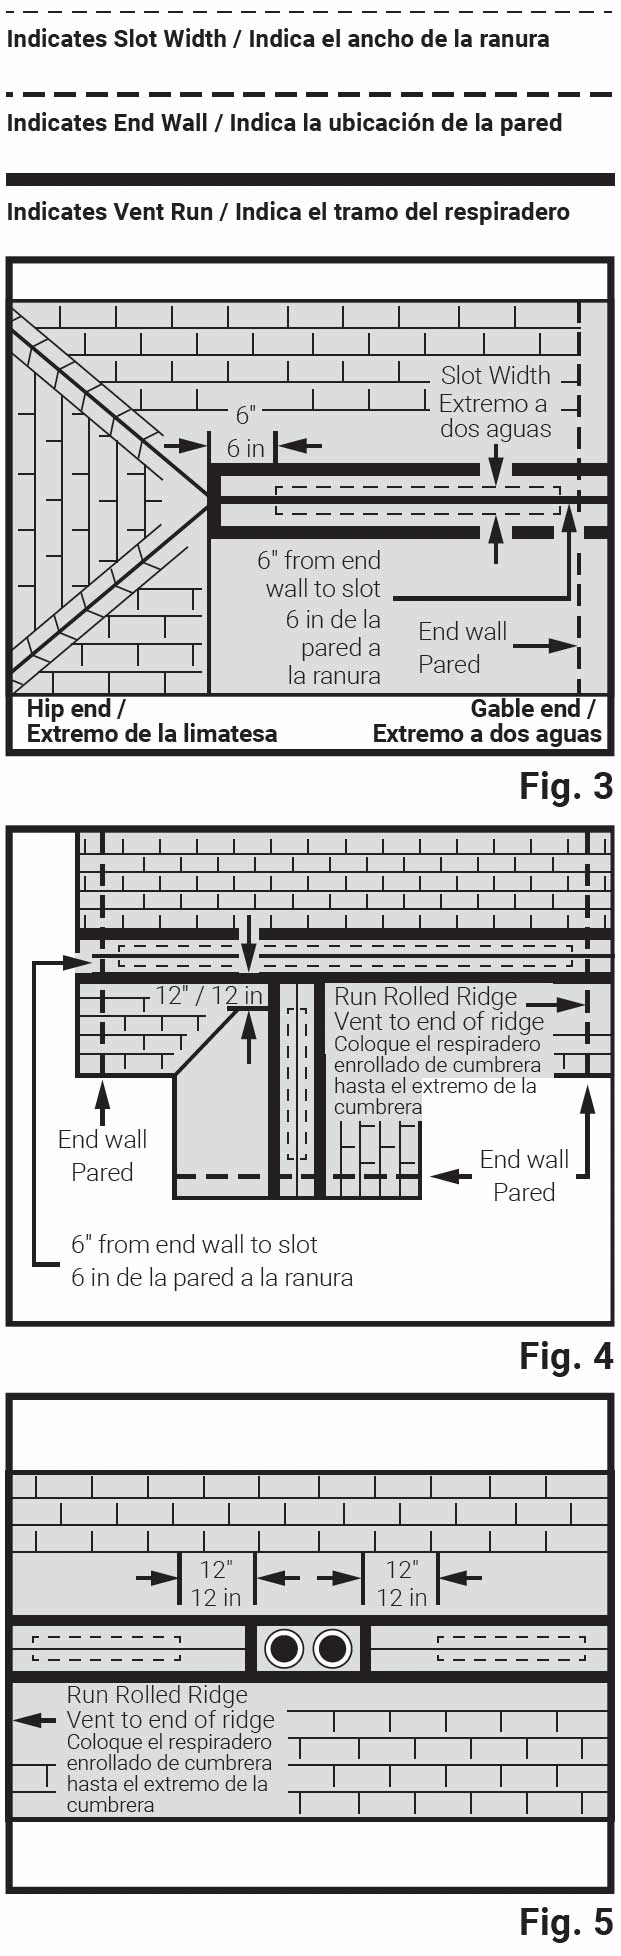
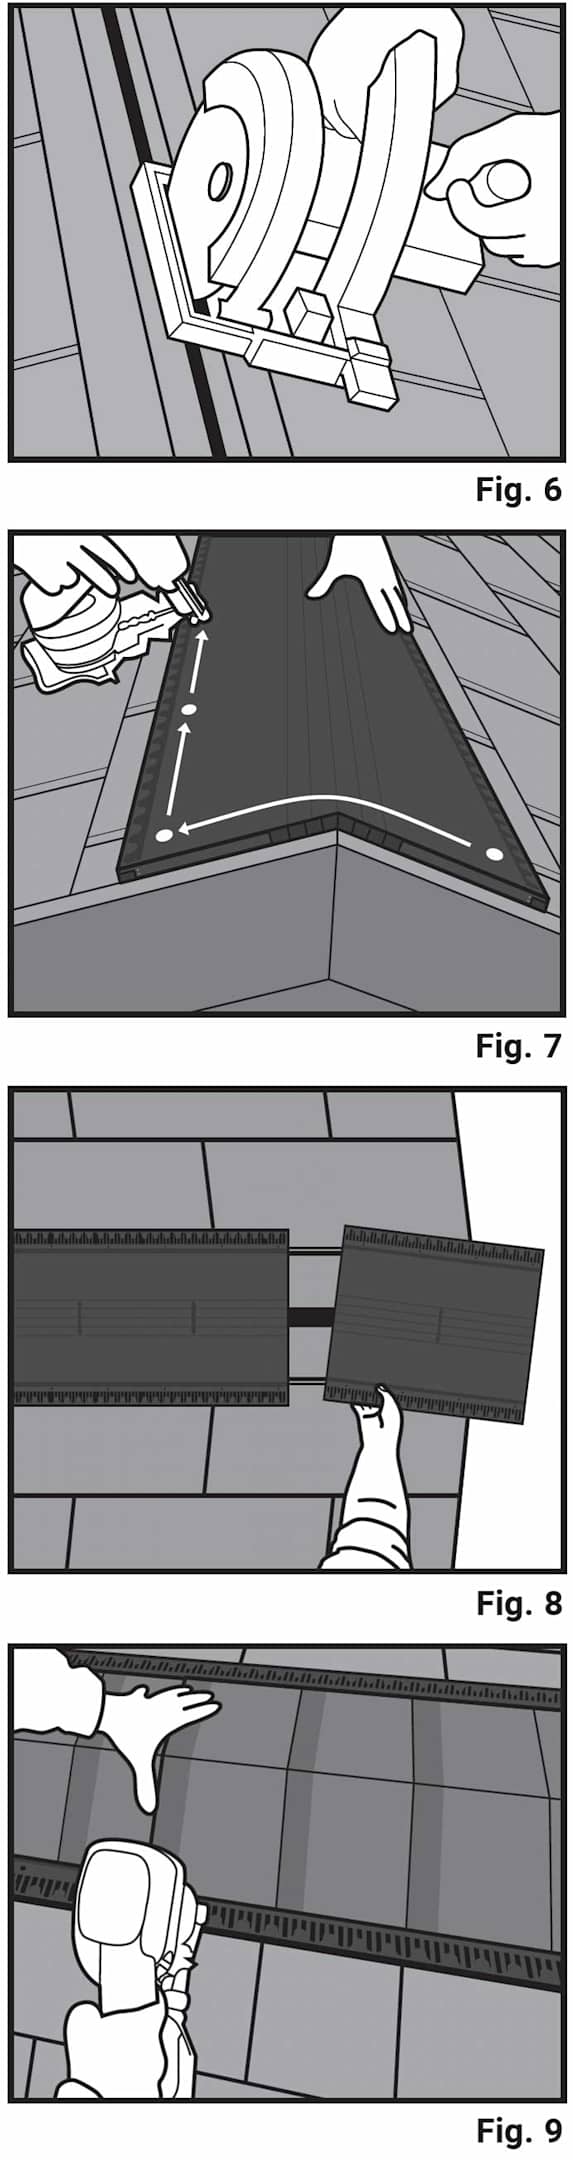
  2. When cutting vent slots, set your saw depth to cut the decking only. Do not cut into the roof framing.
  3. When using pneumatic nail guns to install the vent and/or Hip & Ridge shingles over the vent, special care should be taken. Nails must penetrate ¾" into the roof deck or completely through the deck by 1/8" without compressing the vent. Nails driven too deep will dimple or distort the ridge line. Nails not driven deep enough could allow blow-offs. Fasteners shall comply with ASTM F1667.
  4. When installing vent in cold weather, leave1/8" gap between vent ends to allow for expansion in hot weather.

Instructions for Cutting Slots

Slot Width

Engineered Truss Roof 

For truss roofs, cut a ¾" slot on each side of the ridge for a total slot width of 1 ½". See Fig. 1. 

Ridge Beam Roof 

For roofs with a central ridge beam, cut a 1 ½" slot on each side of the ridge for a total slot width of 3". See Fig. 2

Fig. 1 and Fig. 2

Roof Types 

Hip and Gable Roofs 

Cut slot a minimum of 6” from any end wall or hip intersection. See Fig. 3. 

“L” and “T” Shaped Roofs 

Cut slot a minimum of 12” from of any junction point and within 6" of any end wall. See Fig. 4. 

Chimneys 

Cut slot a minimum of 12” from of a chimney or other vertical wall. Install the vent to butt up against the chimney or vertical wall. See Fig. 5.

Figs. 3-5

Installation Instructions

  1. Use a chalk line to mark out the slot areas to be cut. Cut the ventilation slot openings according to the instructions above. Remove debris from the slot. See Fig. 6.
  2. Roll out and center vent over slot. Nail one end of the vent using the manufactured nail holes. Then nail one entire side of the vent in sequence, keeping the vent pulled tight. Finish by nailing the other side of the vent in sequence, beginning from the originally secured end of the vent. See Fig. 7.
  3. Use a utility knife to cut the final vent section to length, using one of the manufactured cut lines found every 6" on the vent. Ensure that the built-in end plug is exposed on the edge of the vent. For the best appearance, run the ridge vent from rake edge to rake edge. See Fig. 8. 
  4. Apply Hip & Ridge shingles over top of the vent according to manufacturer instructions. See Fig. 9.

Note: The shingle nail line on the vent is a common fastening location for Hip & Ridge shingles and is not a limitation on fastener placement. 

Figs. 6-9

Contact Us

Even though we’re a global company, we’re always ready to answer your questions. Call to speak with an Owens Corning representative.