This is a cache of https://www.owenscorning.com/en-us/roofing/install-instructions/woodstart. It is a snapshot of the page as it appeared on 2026-02-02T06:15:16.180+0000.
WoodStart® Starter Shingles Installation Instructions | Owens Corning Roofing
Skip to main content

Before installing this product, check local building codes for roofing requirements.

These shingles are designed for new or reroofing work over any properly built and supported wood roof deck having adequate nail holding capacity and a smooth surface. Must comply with local building codes.


Precautionary Note:

For use with Owens Corning® Woodmoor® or Woodcrest® Shingles.

The manufacturer will not be responsible for problems resulting from any deviation from the application instructions and the following precautions:

  • Roof Top Loading: Lay shingle bundles flat. Do not bend over the ridge.
  • Roof Deck: Minimum 6 inch roof deck boards, minimum 3/8 inch plywood, minimum 7/16 inch OSB, sheathing spaced minimum 1/8 inch and maximum 1/4 inch. Regardless of deck type used, the roofing installer must:
  1. Install the deck material in strict compliance with the deck manufacturer’s instructions.
  2. Prevent the wood deck from getting wet before, during and after installation.
  • Ventilation: Must comply with local building codes.
  • Handling: Use extra care in handling shingles when the temperature is below 40°F.
  • Storage: Store in a covered, ventilated area at a maximum temperature of 110°F. Bundles should be stacked flat. Do not store near steam pipes, radiators, etc.
  • Fastener Requirement: Use galvanized steel, stainless steel or aluminum nails minimum 12 gauge shank with 3/8 inch diameter head. Owens Corning Roofing recommends that fasteners comply with ASTM F1667. Must comply with local building codes. All Fasteners must penetrate at least 3/4 inch into the wood deck or completely through the deck by a minimum of 1/4 inch.

    Notice: Owens Corning Roofing requires the use of nails as the method of attaching shingles to wood decking.

Installation Instructions

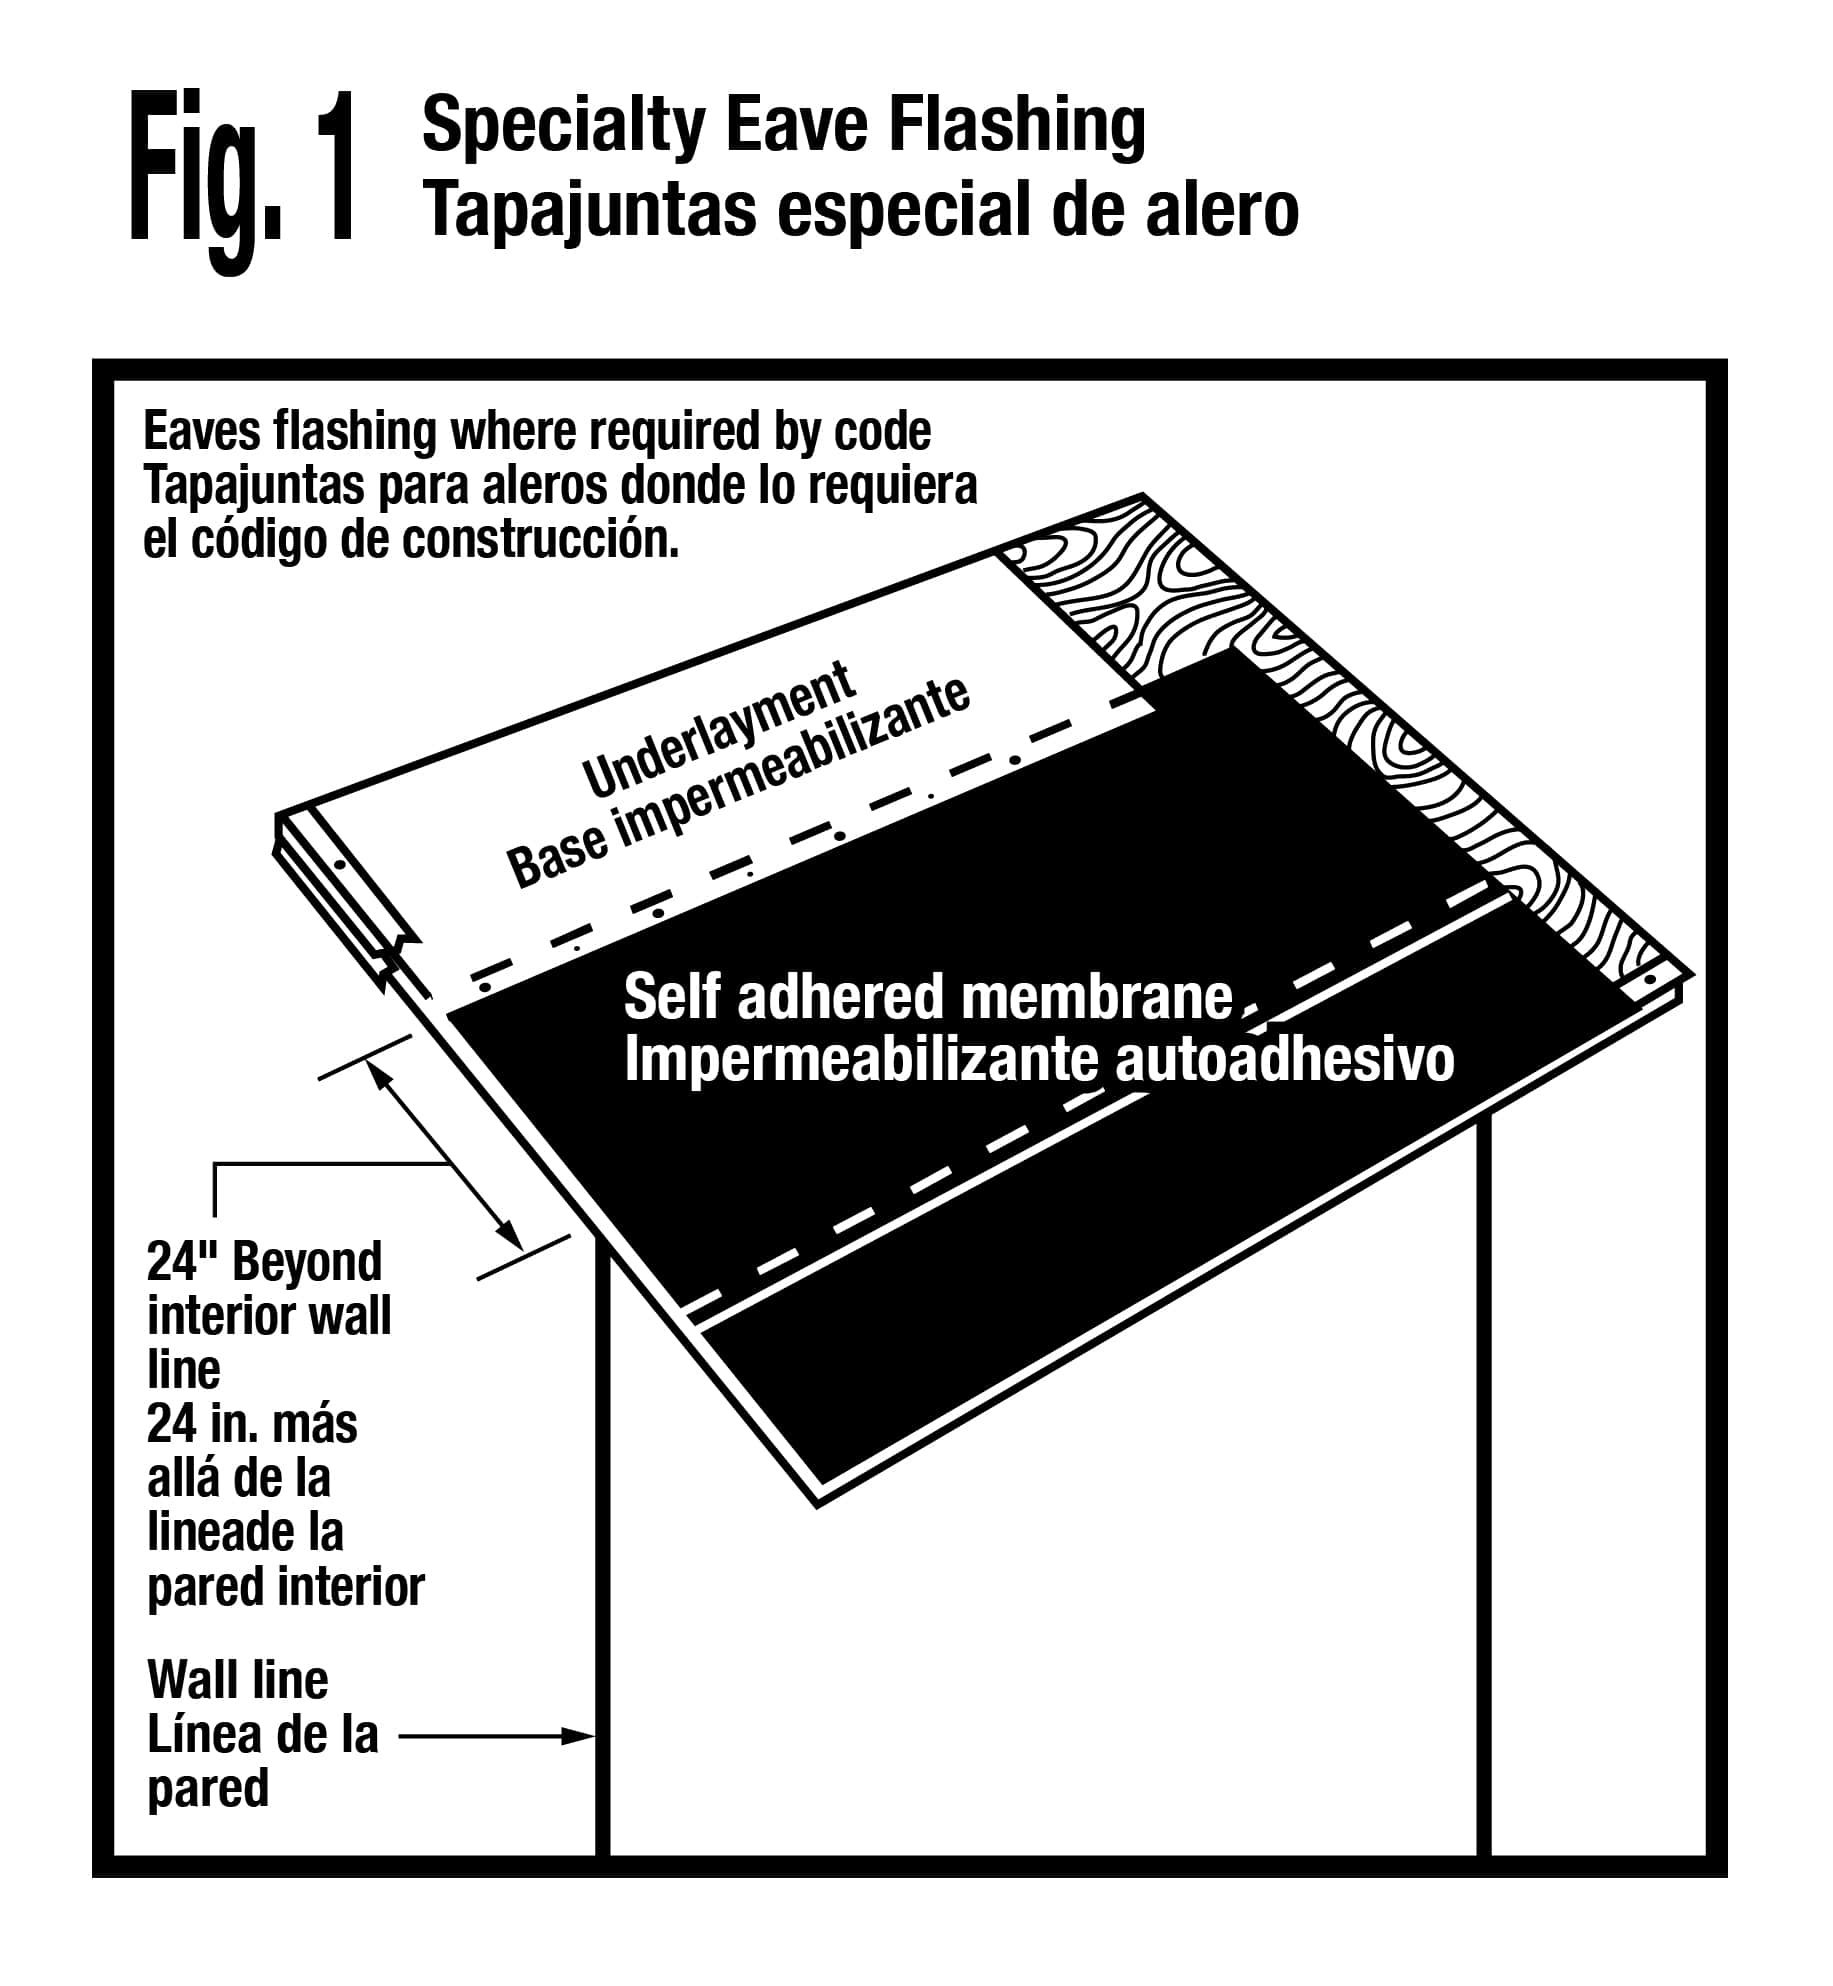
Specialty Eave Flashing

Where required by local codes, WeatherLock® underlayment or equivalent ice and water protection must be applied from the eave edge to a point at least 24″ beyond the interior line of the exterior wall. See manufacturer’s installation instructions. See Fig. 1

Fig. 1

Underlayment

Standard slope (4″ in 12″ or more) Application of underlayment, metal drip edges, and eaves flashing. See Fig. 2

Low slope (2″ in 12″ to less than 4″ in 12″) Application of underlayment and metal drip edges. See Fig. 3

Or WeatherLock® self-adhered underlayment or equivalent with a standard over lap of 3 inches and metal drip edge. See Fig. 3A.

Shingle Fastening Pattern

Five Nail Fastening Pattern: Use 5 fasteners. See Fig. 4.

Fig. 4

Starter Course

Left Rake Application: Cut 35 inches off from the first bottom starter piece. Fasten the remaining 5 inch x 13 3/8 inch to the deck as shown in Fig. 5, followed by a full 13 3/8 inch x 40 inch starter piece to the deck with 5 fasteners as shown. See Fig. 5.

Right Rake Application: Cut 5 inches off from the first bottom starter piece. Fasten the remaining 35 inch x 13 3/8 inch to the deck as shown in Fig. 6, followed by a full 13 3/8 inch x 40 inch starter piece to the deck with 5 fasteners as shown. See Fig. 6.

Fig 5
Fig 6

Note: Apply Woodcrest® or Woodmoor® Shingles after WoodStart® Starter Shingles are installed. Apply Woodcrest® or Woodmoor® Shingles per the application instructions printed on the shingle wrapper.

Contact Us

Even though we’re a global company, we’re always ready to answer your questions. Call to speak with an Owens Corning representative.